Reviving Disposable Cameras: A Comprehensive Guide to Reloading and Developing Film
| Shelf | Cameras & Lenses |
|---|---|
| Date in | |
| Readers | 868 |
Discover how to extend the life of disposable cameras by reloading them with fresh film, selecting the right film, and developing your shots at home.
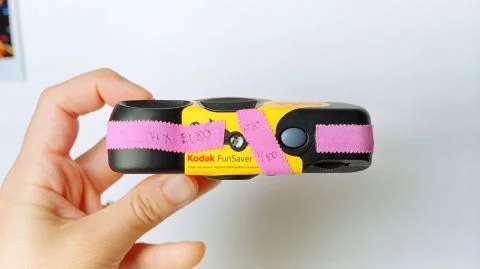
Disposable cameras have carved a niche for themselves in the realm of photography, offering a blend of simplicity and nostalgia. However, their limitations—particularly regarding film options and the finite number of exposures—can be frustrating. Thankfully, there's a creative solution: reloading disposable cameras with fresh film can not only extend your shooting experience from 27 frames to over 36 but can also yield unique artistic results.
Essential Tools for Reloading
To breathe new life into your disposable camera, you'll need a few key tools:
- Kodak FunSaver: This single-use camera comes preloaded with ISO 800 color-negative film and is widely considered a top choice for reloading. Its plastic hinges make it easy to open and reseal, allowing for multiple uses. The FunSaver's 30mm f/10 lens captures vibrant images with a focus-free setting, making it perfect for casual photography.
- Dark Changing Bag: While you can create a completely dark environment in your bathroom, a dark changing bag is a handy tool to have when handling film. It ensures you can work without risking exposure to light.
- Film Leader Retriever Tool: If you plan to develop your film at home, having a film leader retriever is invaluable, as it simplifies the process of extracting the film from the cartridge.
- Flat Screwdriver: A flat screwdriver is essential for prying open the camera’s plastic hinges without causing damage.
- Sharp Knife or Box Cutter: Use these tools to carefully remove any stickers or seals from the camera.
- Cutting Mat: An essential safety measure, a cutting mat will protect your workspace while you handle sharp tools.
While acquiring all the above tools is ideal, many can be substituted with items you likely already have at home. Remember to have a roll of film ready to load into your camera.
Selecting the Right Film
Choosing the correct film for your reload is crucial for achieving desirable results. Here are some popular options:
- Color Negative Film: This is a great starting point, particularly the Kodak Portra or Fujifilm Superia series. These films offer a good balance of color accuracy and dynamic range, ideal for various lighting conditions.
- Black and White Film: If you prefer classic monochrome shots, films like Ilford HP5 or Kodak Tri-X provide excellent results. They lend themselves well to developing at home and yield beautiful, dramatic images.
- Specialty Films: Consider experimenting with orthochromatic or infrared films for unique effects. Ortho films can produce striking portraits by rendering skin tones differently than standard films.
Before reloading, ensure your selected film fits the camera's specifications—most disposable cameras are designed for 35mm film.
How to Reload a Disposable Camera
Once you've selected your tools and film, follow these steps to reload your camera:
- Open the Camera: Use a flat screwdriver to carefully pry open the plastic hinges without damaging the camera. Apply gentle pressure to prevent breaking the plastic.
- Remove Old Film: Extract any remaining film from the camera. A film leader retriever can simplify this process, as it allows you to pull the film out without direct exposure to light.
- Load Fresh Film: Place the new roll of film in the designated compartment. Ensuring the film is aligned correctly is essential for proper operation.
- Sealing the Camera: Once the film is loaded, carefully close the camera back, making sure the hinges snap back into place without light leaks. You may want to use safety tape around the seams for added protection.
After reloading, your camera is ready for a new adventure. Experiment with different shooting conditions, taking advantage of the camera's flash and other settings for creative effects.
Developing Your Film
Post-shooting, developing your film can be done at home or through a lab. If you choose to develop at home, here are the basic steps:
- Darkroom Setup: Ensure your workspace is light-tight. Use a dark changing bag if you don’t have access to a darkroom.
- Follow Development Instructions: Each type of film requires specific chemicals and times. Refer to the instructions provided with your film for the best practices.
- Scanning or Printing: After developing, you'll have the option to either scan your negatives for digital use or create prints. Scanning is a popular choice for sharing on social media.
Developing your own film can be a rewarding process, allowing you to see firsthand the results of your creativity. With the right tools and knowledge, the world of disposable cameras can be an exciting and fulfilling avenue for exploration.
Final Thoughts
Reloading and developing a disposable camera is not only a budget-friendly way to continue using your camera but also a fun and educational experience. By selecting the right tools and films, you can capture beautiful images while also honing your photography skills. As you embark on this journey, remember that experimentation is key—each reload offers a new opportunity for exploration.